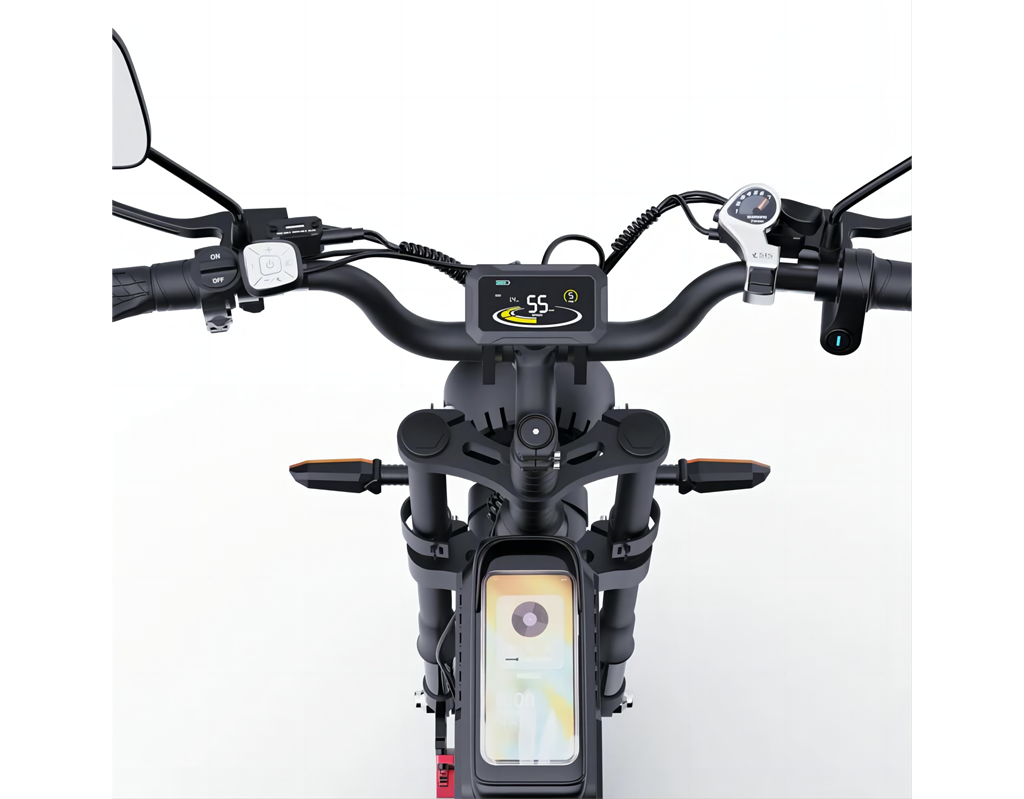
RIDSTAR Q20 Pro Display Function Description

How to Access & Change Display Setting
- Turn on the Q20 Pro ebike: Press and Hold the Power button on the controller until the display appears and you’re ready to go.
- Access Q20 Pro ebike display setting: Press and Hold + & – simultaneously for more than 2 seconds to enter the personalized parameter setting interface.
- Press +/- to toggle between the personalized parameter setting interface, and press i to enter the parameter changing state
- Press +/- to select the parameter, long press + for addition operation, long press – for subtraction
- operation
- Press i to save the parameter settings and return to the personalized parameter setting interface.
- Long Press i to save the parameter settings and exit the personalized parameter setting interface

RIDSTAR Q20 Pro Personalized parameter settings
P1 is the metric and imperial setting, 00 for metric and 01 for imperial.
P2 is the rated voltage setting. The available rated voltage range is: 24V, 36V, 48V, 52V.
P3 is the Pedal assist (PAS) level setting. The available Pedal assist level settings are: 0~3, 1~3, 0~5, 1~5, 1~7, 0~7, 0~9, 1~9
P4 is the wheel diameter setting. The adjustable wheel diameter range is: 1~50inch (no need setting)
P5 is the speed sensor magnet number setting. The adjustable speed sensor magnet number range is: 1 ~ 100 pcs.(no need setting)
P6 is the speed limit setting. The adjustable speed limit range is: 1~100km/h. (The maximum adjustable speed limit
varies by different protocols)
P7 is the start-up setting. The display can choose the following start modes: 00→zero start, 01→non-zero start.
P8 is the drive mode setting. The available drive modes are: 00→Pedal assist only, 01→Electric only, 02→Both Pedal assist and electric
P9 is the pedal assist sensitivity setting. When set to higher numbers, it will take more crank rotations to activate the motor. On lower numbers, it will take little crank rotation to activate the motor. The adjustable range is: 1~24.
PA is the Pedal assist strength setting. The Pedal assist strength is the relative strength of the PWM signal from the controller when start to activate pedal assist. The adjustable range is 0 ~ 5. 0 is the weakest strength and 5 is the strongest.
Pb is the number of pedal assist sensor magnets setting. The adjustable range: 1~15 pcs.
PC is the controller current limit setting. The adjustable range is: 1~50A.
Pd is the battery under voltage setting. The value can be adjusted based on the current rated voltage.
PE is the power-on password setting. The power-on password is not activated by default but users can activate it from setting PSd-y. The factory default password is 1212. Users can set other four-digit password. Please keep the password in mind after changing it, otherwise you will not be able to use the display.
PF is the auto sleep time setting. To save the battery power and reach higher range, this display will be turned off after it has not been used for a time. The adjustable range is: 1~60min, 00 means no auto shutdown. The factory default setting is 10 minutes.
RIDSTAR Q20 Pro Shortcut Operation
Restore factory settings operation
dEF is the restore factory default parameter settings. dEF-Y is to restore the factory default settings, and dEF-N is not to restore.
Enter into the main setting interface and keep the speed at 0, press Lighgt and + hold and simultaneously for 2s to enter the restore factory default setting interface. Pressing +/- to toggle to dEF-Y. Then after pressing i to confirm, the display will show dEF-0 for a few seconds and then automatically start to restore the factory default settings. The display will automatically exit to setting interface after the restoration. Trip odometer reset operation
The display can record trip odometer and odometer. Trip odometer is not automatically reset after turning off. The trip odometer needs to be reset manually. The odometer can not be reset.
Enter into the main setting interface and keep the speed at 0, press and hold i and – simultaneously for 2s to reset the trip odometer. The main interface will flash during the reset process.
RIDSTAR Q20 Pro Error Code
| Error Code | Definition |
| E001 | Controller failure |
| E002 | Communication failure |
| E003 | Hall failure |
| E004 | Throttle failure |
| E005 | Brake failure |
| E006 | Motor phase failure |
RIDSTAR Q20 Pro pedal assist level default ratio value


